What are the User Profiles?
THIS FEATURE IS AVAILABLE FROM VERSION 2.1.0. FOR EARLIER VERSIONS, REFER TO THE PAGE STAFF–>USERS
The User Profiles are designed to allow the Administrator to better and easily assign specific permissions to one or more users according to their usual scope of work and role in the organization.
The Administrator is responsible for:
- creation of a User Profile
- configuration of a User Profile
- assignment of a User Profile to a user
The configuration process allows the Administrator to decide, for each Module included in the license, which sections and resources should be made available to the users belonging to a User Profile.
Since the permissions can be assigned at a very high level of detail, we recommend creating as many User Profiles as there are skills the user will need to have or activities he/she will have to perform within the organization.
Installing XCALLY Motion (from version 2.1.0 onwards)
When XCALLY Motion is installed for the first time
                            one default User Profile is provided: this profile must be customized according to the permissions you wish to grant to your
                            User/Users (it doesn't allow any permission by default).
When XCALLY Motion is installed as an update
                            for any set of permissions applied to the existing Users, a new User Profile (named profile_<progressive number>) will be created and
                            the corresponding Users will inherit it in the Account's Personal Info.
                            In this case if more than one User share the same Permissions set, they will belong to the same User Profile.
Create a User Profile
In the User Profiles List, click on the Add button:

Insert the new profile name, description and choose the permission type.

The Permission Type can be:
- Read
- Read and Edit
- Read and Delete
- Read, Edit and Delete

The Permission Type specified in this form is automatically inherited by every module, section and resource that will be enabled in the User Profile, unless manually overridden in the configuration panel of the specific section.
Add/Modify Permissions to User Profile
By default, when a new User Profile is created all the Modules and Sections are disabled (grey icon):
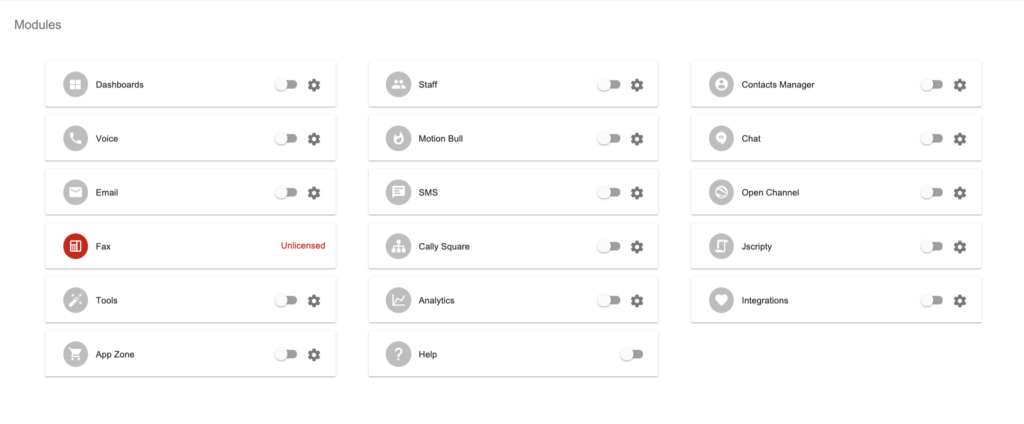
The icon near the name of the Module can be:
- Red for Unlicensed: the Module is not included in the license and no configuration is allowed.

- Orange for Partial enabling: only some Module’s sections are enabled or all of them are enabled, but not all their related resources are.

- Green for Full enabling: all Module’s sections and all their related resources are enabled.

toggle to select all resources
If you want to fully enable a Module (eg. the complete Voice Module) you can click on the switch


and confirm your action:


Now the Module icon turns green and the switch is on.


By doing this, all the Module's sections will be automatically enabled (e.g. Voice Queues, Inbound Routes, Voicemails and so on) and all their related resources will become available.
All the sections will inherit the Permission Type assigned to the User Profile (in the example below the "Read" permission):


You can also automatically associate all the resources of a single section without enabling the entire Module by clicking on the switch inside the Module's configuration panel.
This action will associate all present and future resources of that section to the User Profile.
Manual association is disabled.


Switching it off will remove all the resources of that section and will prevent any future resource to be automatically associated to the User Profile.
This implies that for each User Profile, only the resources created by one of its users will be automatically associated.
If you want to give Users belonging to a User Profile access to any resource created by a User belonging to another User Profile, you must manually associate that specific resource.
Manual association is enabled.


Once you switch the selector on , all the resources to which it refers are associated to the User Profile: if you want to come back and reduce the set of functions and the resources available, switch it off, click on   and proceed manually to disable the resources you don't want to be associated to the User Profile anymore.
You can also manually configure one module’s sections and their related resources by clicking on the ![]() icon.
icon.
In the configuration panel that will open you can define for each section:
Visibility
Hide or show the section in the User Desktop side menu, when the User is logged into his web GUI
 | show |
 | hide |
Permissions
You can override the permissions inherited by the User Profile, by changing it only for a specific section.
If the icon is green, it means they are enabled.
| read | |
| edit | |
| delete |
Example:
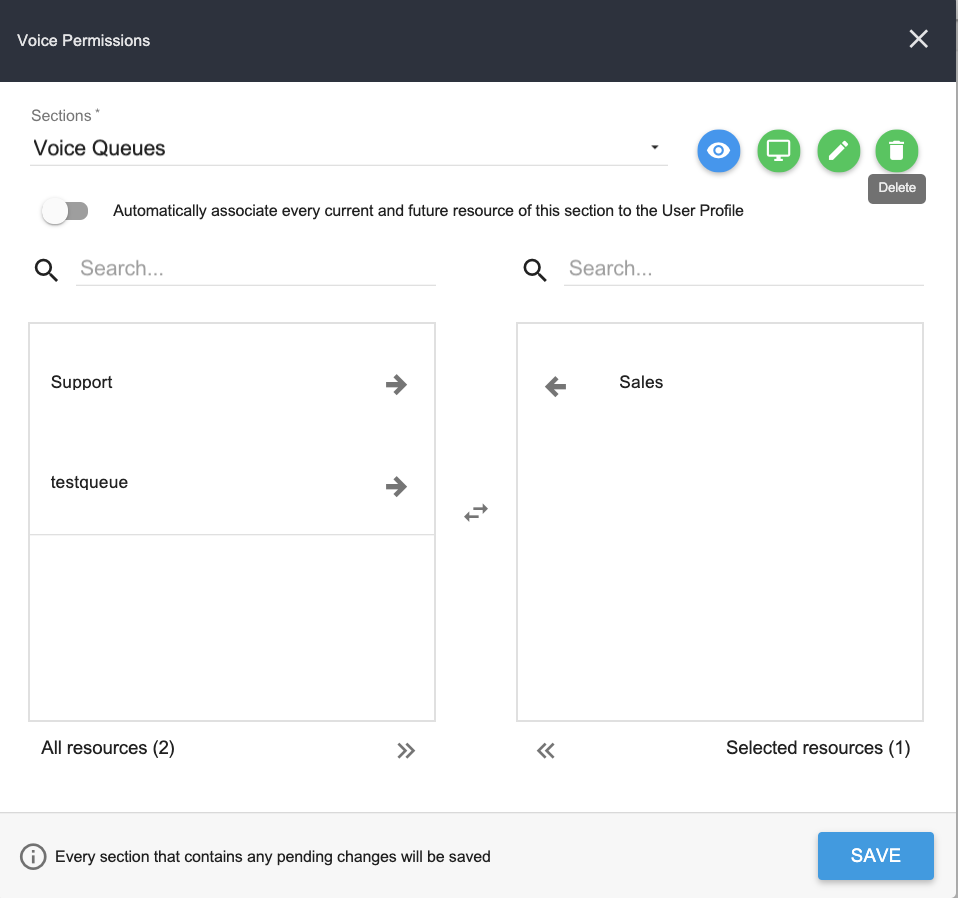
Among all the existing Voice Queues (left panel), only the “Sales” queue will be available to the user in read only mode ( ![]() )
)
like in the following example, where among all existing Voice Queues (on the left side), only the “Sales” one will be visible to the User, both as a menu item and as its contents (in the example, it will be available for the User in read mode only ![]() ):
):

If you only set the Read permission to a Section, all its resources cannot be modified by the user, therefore:
- any action inside the three dot menu
 that requires the Edit or Delete permissions will not be displayed
 - the user can view the resource detail where present (all fields are disabled)
- fast edit is disabled where present
Resources association
Note that it is not necessary to enable a section in order to associate one of its resources to a User Profile.
Simply associating the resource will make it available in every context it may be used (read-only permission).

Example -  Add an Agent to a Voice Queue
Any associated voice queue will be available for association even if the Voice Queue section is not enabled and therefore not visible in the sidebar menu.
About the Lists of Items associated to a Resource:
Every List of items (e.g.: sounds, contexts, lists, actions, etc) that can be chosen and linked to a Resource (e.g: Accounts, Websites, Queues, etc), can be associated or not to the User Profile:
- if so, the Users belonging to the Profile can freely use it and associate/disassociate it to the resources (in create or edit mode)
- if not, the Users belonging to the Profile can only see it (only in edit mode, not in create) but not associate/disassociate it to the resource.
 Let's see how will it be when the User create or edit an agent-queue association:
- Example 1 (Create Mode):
 In the example above, when the User creates an agent he can only choose to associate one or both of the voice queues assigned (test1, test2) to the Profile.
- Example 2 (Edit Mode):
 In the example above, the User Profile permissions allow the User to associate/disassociate to the Agent only the queues "test1" and "test2" (clicking on the single
 Please note that anytime you click on Save, all the changes you have done to the permissions of any section and resource belonging to the same module will be saved as a whole:
Dashboards
In order to add or change permissions to the default Dashboards to a User Profile, click on the Permissions tab:

and then on the Dashboard profile icon ![]() :
:

Now select the resource (General), set the proper permissions and grant the visibility:

and Save changes.
Please note that anytime you click on Save, all the changes you have done to the permissions of any section and resource belonging to the same module will be saved as a whole:
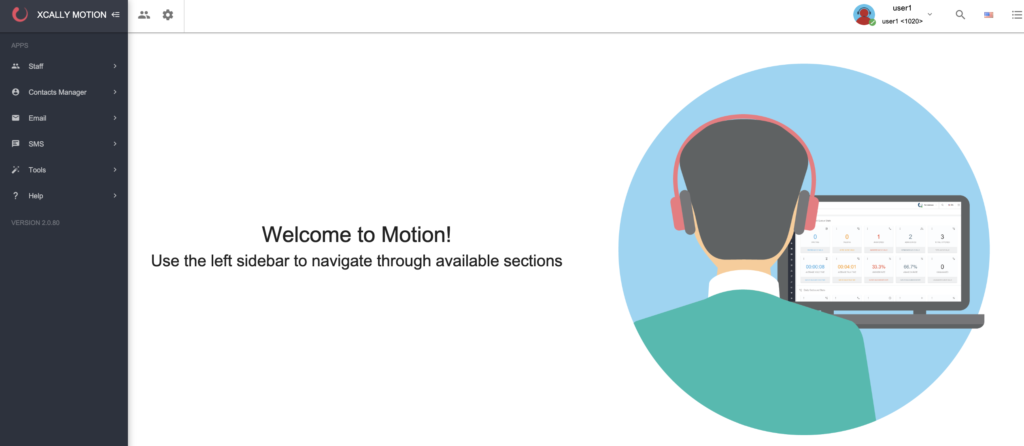
If the General Dashboard is not associated to the User Profile, the Home screen displayed to the User will be like the following:
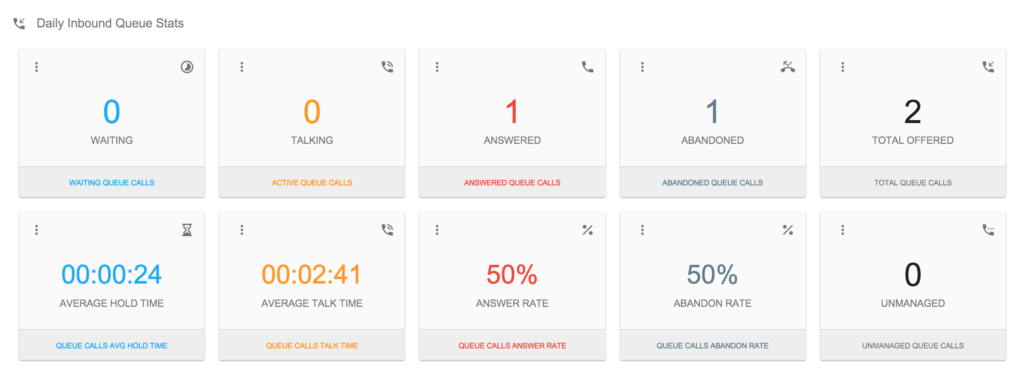
otherwise the Home will display the General Dashboard:
You may enable the Custom Dashboards in the Tools Module.
If, for example, both Dashboards types (custom and general) are associated to this profile and the visibility is granted, the user will see a Dashboard submenu containing all the available entries.
Staff
In order to add or change permissions to the Staff to a User Profile, click on the Permissions tab:

and then on the Staff profile icon ![]() :
:

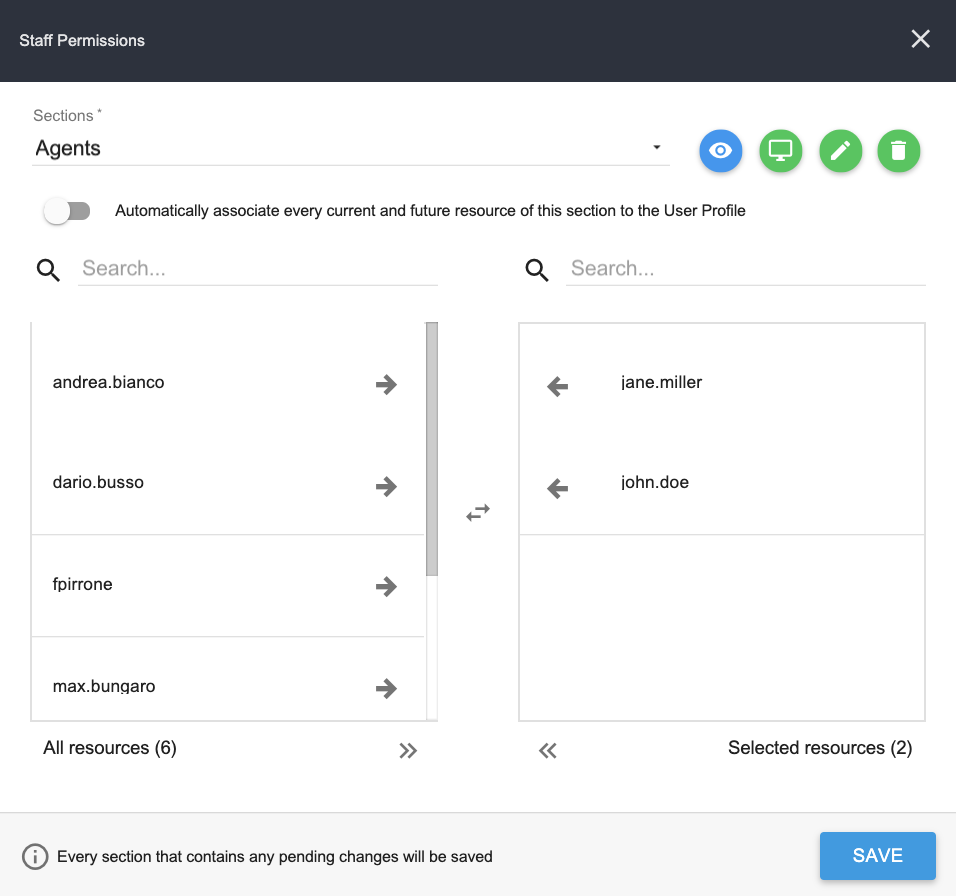
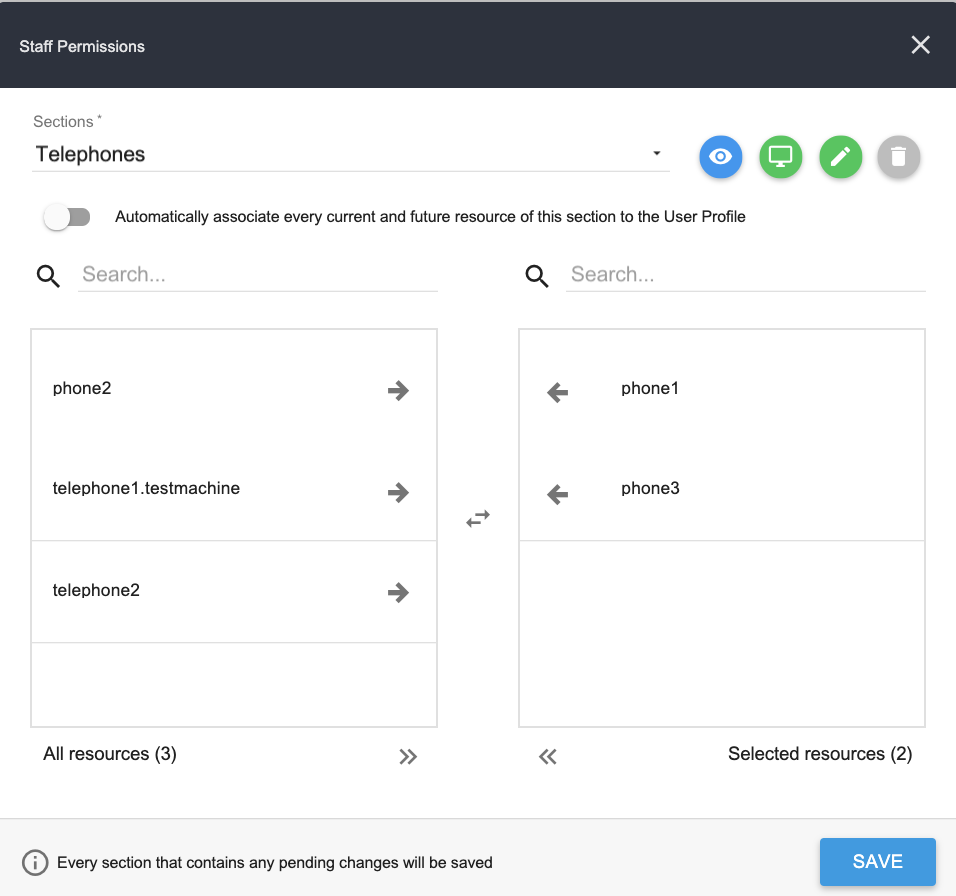
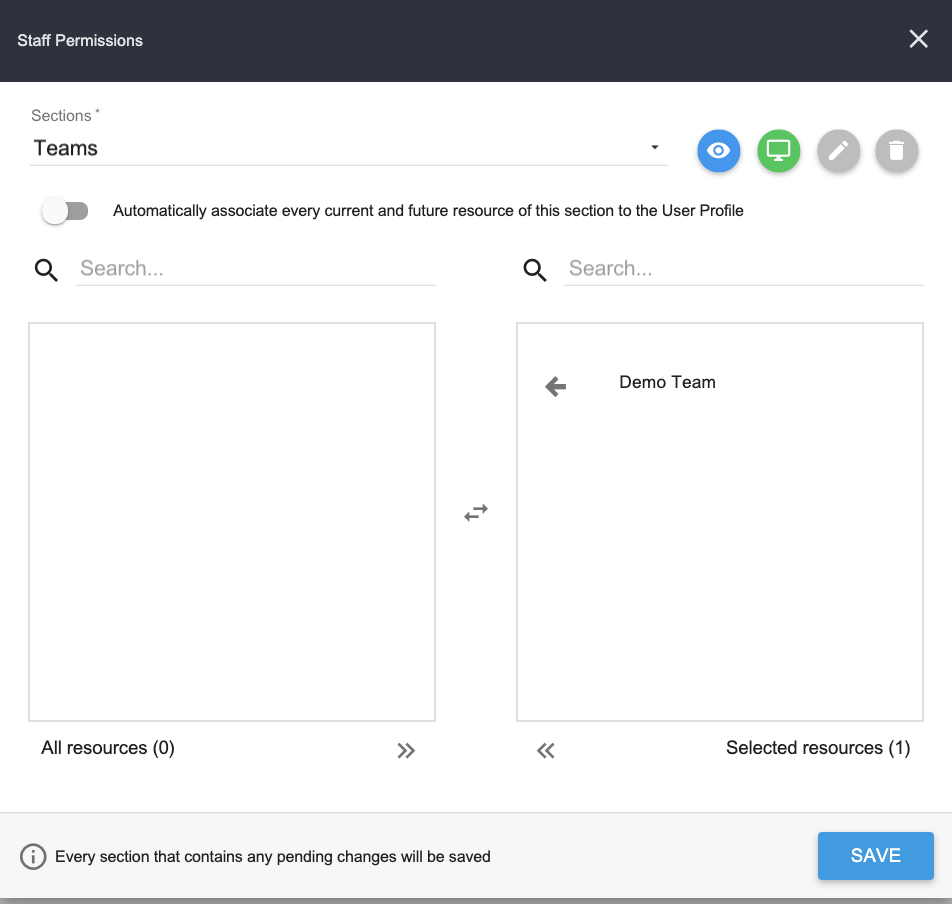
Now choose one by one all the sections whose permissions you want to associate to this User Profile among the following:
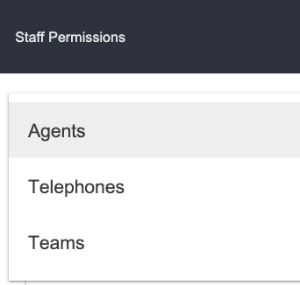
- Agents
- Telephones
- Teams
For example you can:
- choose a list of Agents existing on the system and associate them to the user profile, adding visibility and permissions:
- choose which Telephones to associate to this profile and decide which permissions and visibility to give:
- add permissions to specific Teams:
Please note that anytime you click on Save, all the changes you have done to the permissions of any section and resource belonging to the same module will be saved as a whole:
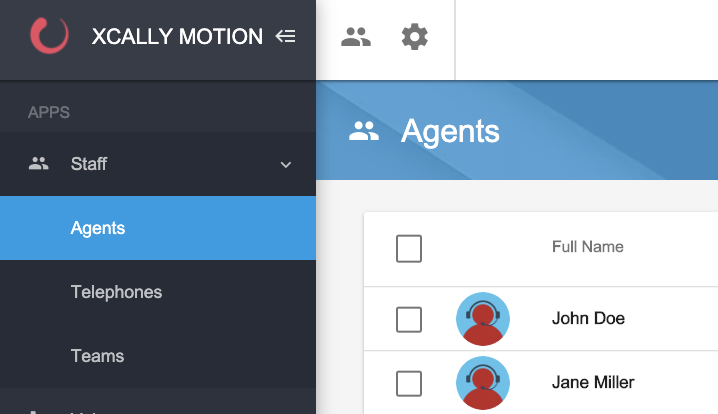
At the end the Users belonging to this profile will have the following XCALLY Motion Desktop view:
Remember to associate also the Queues (in the specific Channel Module) you want the User to manage: the Users having this profile will manage only those who have been associated to it.
Contacts Manager
In order to add or change permissions to the Contacts Manager features to a User Profile, click on the Permissions tab:

and then on the Contacts Manager profile icon ![]() :
:

Now choose one by one all the sections whose permissions you want to associate to this User Profile among the following:
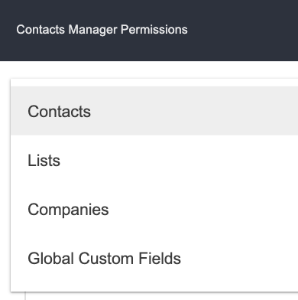
- Contacts
- Lists
- Companies
- Global Custom Fields
For example you can:
- choose to add all the Contacts on the system to the user profile, adding visibility and permissions:

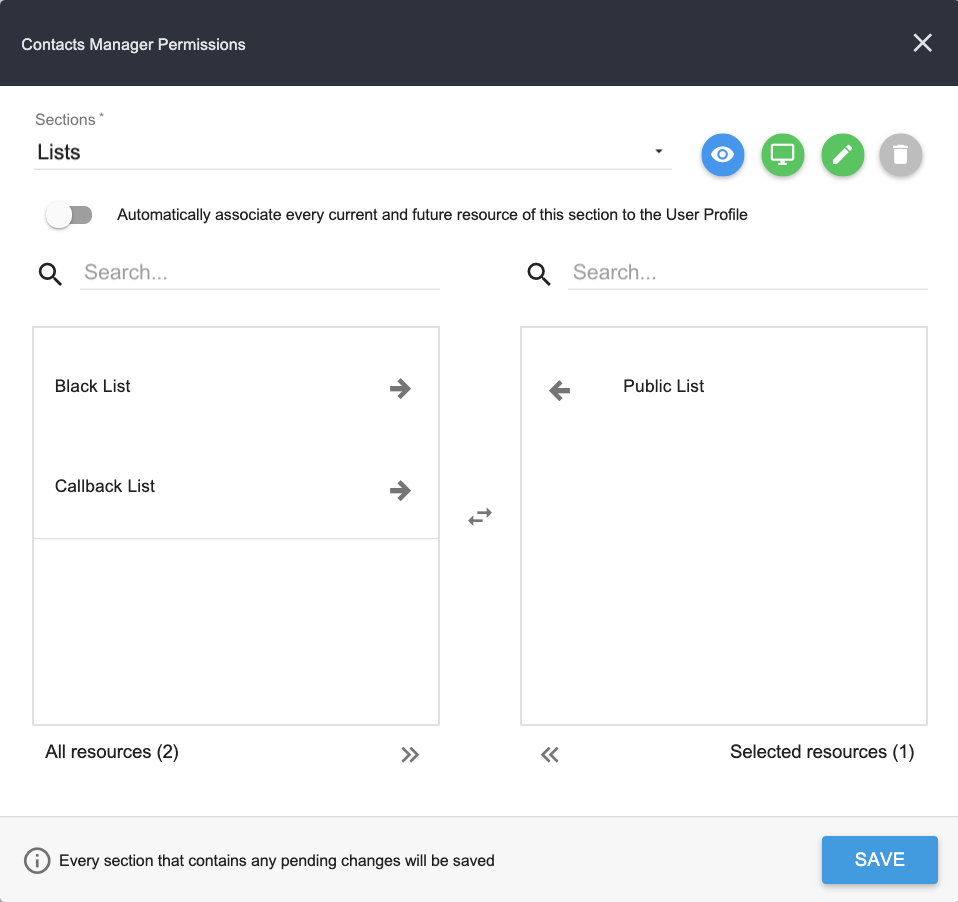
- choose which Lists to associate to this profile and decide which permissions and visibility to give:
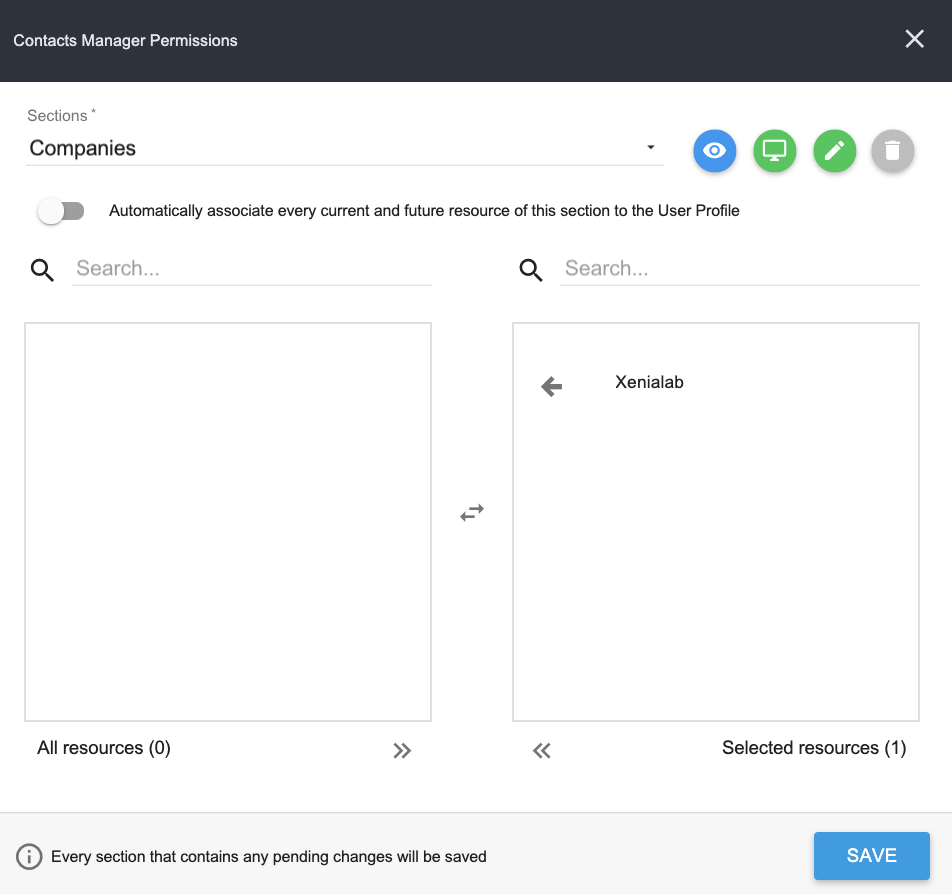
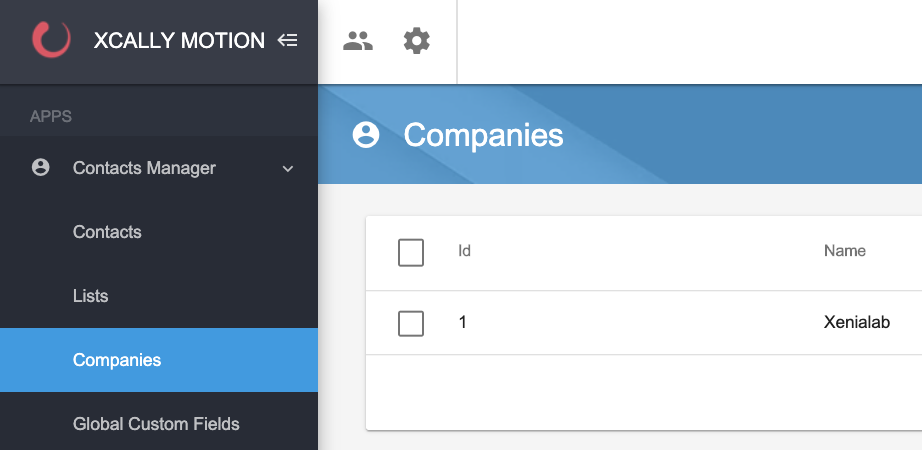
- choose which Companies to associate to this profile and decide which permissions and visibility to give:
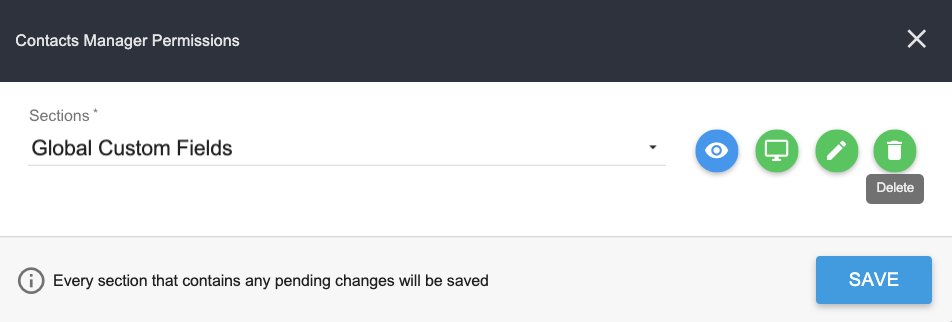
- and if to associate all the Global Custom Fields to this profile:
Please note that anytime you click on Save, all the changes you have done to the permissions of any section and resource belonging to the same module will be saved as a whole:
Remember to associate the Lists used by the Bull Dialer if you want the Users belonging to the profile can manage them!
At the end the Users belonging to this profile will have the following XCALLY Motion Desktop view:
Voice
In order to add or change permissions to the Voice to a User Profile, click on the Permissions tab:

and then on the Voice profile icon ![]() :
:

Now choose one by one all the sections whose permissions you want to associate to this User Profile, among the following:
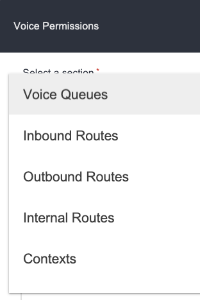
- Voice Queues
- Inbound/Outbound/Internal Routes
- Contexts
- Voicemails
- Music on Hold
- Voice Recordings
- Chanspy
- Out Prefixes
- Realtime
About Contexts
Warning: the default contexts cannot be removed from a User Profile
For example, among the others, you can:
- choose one or more Voice Queues existing on the system and associate them to the user profile, adding visibility and permissions:
- add the Realtime section:
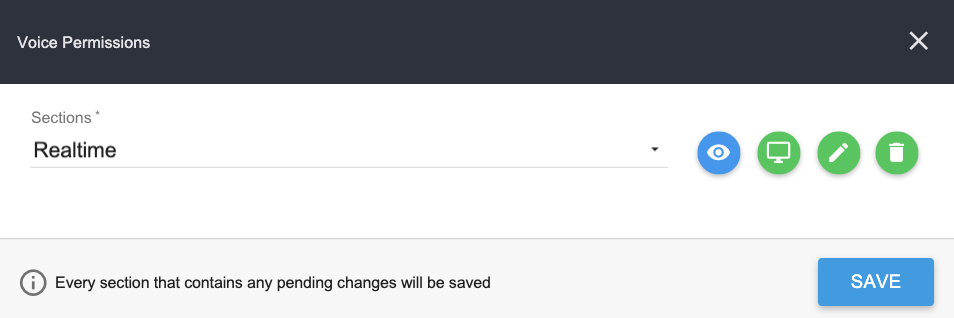
Remember to associate also the Agents and the Telephones (in the Staff Module) you want the User to manage: the Users having this profile will manage only those who have been associated to it
- add Internal routes (in the example below, all of them):

Please note that anytime you click on Save, all the changes you have done to the permissions of any section and resource belonging to the same module will be saved as a whole:
At the end the Users belonging to this profile will have the following XCALLY Motion Desktop view:

Motion Bull (Dialer)
In order to add or change permissions to Motion Bull to a User Profile, click on the Permissions tab:

and then on the Motion Bull profile icon ![]() :
:

Now choose one by one all the sections whose permissions you want to associate to this User Profile among the following:

- Queue Campaigns
- IVR Campaigns
- Realtime
For example you can:
- choose to associate existing Queue or the IVR Campaigns to the user profile, adding visibility and permissions:

Please note that anytime you click on Save, all the changes you have done to the permissions of any section and resource belonging to the same module will be saved as a whole:
- enable the dialer Realtime section:

Remember to associate the Lists used by the Bull Dialer if you want the Users belonging to the profile can manage them!
Chat
In order to add or change permissions to the Chat to a User Profile, click on the Permissions tab:

and then on the Chat profile icon ![]() :
:

Now choose one by one all the sections whose permissions you want to associate to this User Profile among the following:

- Chat Queues
- Chat Websites
- Realtime
For example you can:
- choose to associate existing Chat Queues or the Websites to the user profile, adding visibility and permissions:

Please note that anytime you click on Save, all the changes you have done to the permissions of any section and resource belonging to the same module will be saved as a whole:
- enable the Realtime view of the Chat activities:

Remember to associate also the Agents (in the Staff Module) you want the User to manage: the Users having this profile will manage only those who have been associated to it
Finally the Users belonging to this profile will have the following XCALLY Motion Desktop view:
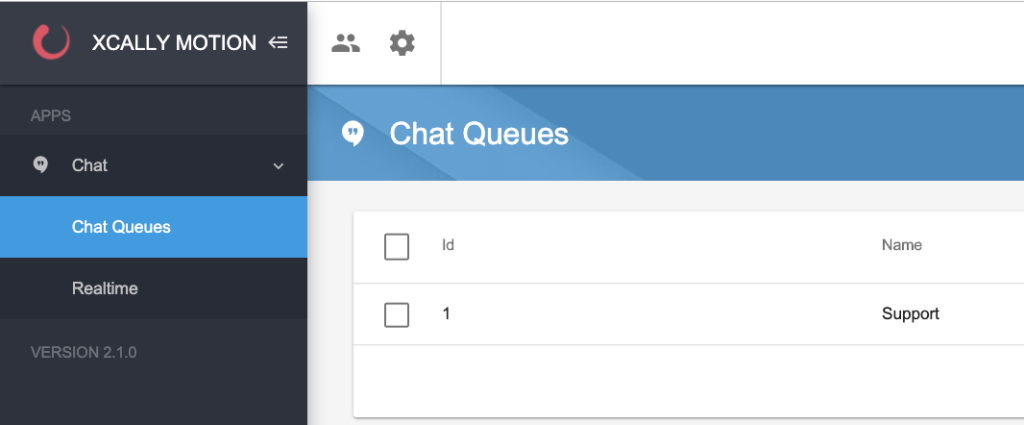
In order to add or change permissions to the Email to a User Profile, click on the Permissions tab:

and then on the Email profile icon ![]() :
:

Now choose one by one all the sections whose permissions you want to associate to this User Profile among the following:

- Email Queues
- Email Accounts
- Email Sub-statuses
- Realtime
For example you can:
- choose one or more Email Queues existing on the system and associate them to the user profile, adding visibility and permissions:

- choose one or more Email Accounts existing on the system and associate them to the user profile, adding visibility and permissions:

- enable all sub-statuses in order to let the User belonging to this profile to manage them:

- enable the Realtime view of the Email activities:

Please note that anytime you click on Save, all the changes you have done to the permissions of any section and resource belonging to the same module will be saved as a whole:
Remember to associate also the Agents (in the Staff Module) you want the User to manage: the Users having this profile will manage only those who have been associated to it.
Finally the Users belonging to this profile will have the following XCALLY Motion Desktop view:

SMS/FAX
In order to add or change permissions to SMS or FAX to a User Profile, click on the Permissions tab:

and then on the SMS or FAX profile icon ![]() :
:


Now choose one by one all the sections whose permissions you want to associate to this User Profile among the following:

- SMS Queues
- SMS Accounts
- Realtime

- FAX Queues
- FAX Accounts
- Realtime
Proceed as for the other modules (for instance, Email or Chat).
Please note that anytime you click on Save, all the changes you have done to the permissions of any section and resource belonging to the same module will be saved as a whole:
Open Channel
In order to add or change permissions to Open Channels to a User Profile, click on the Permissions tab:

and then on the Open Channel profile icon ![]() :
:

Now choose one by one all the sections whose permissions you want to associate to this User Profile among the following:

- Open Channel Queues
- Open Channel Websites
- Realtime
For example you can:
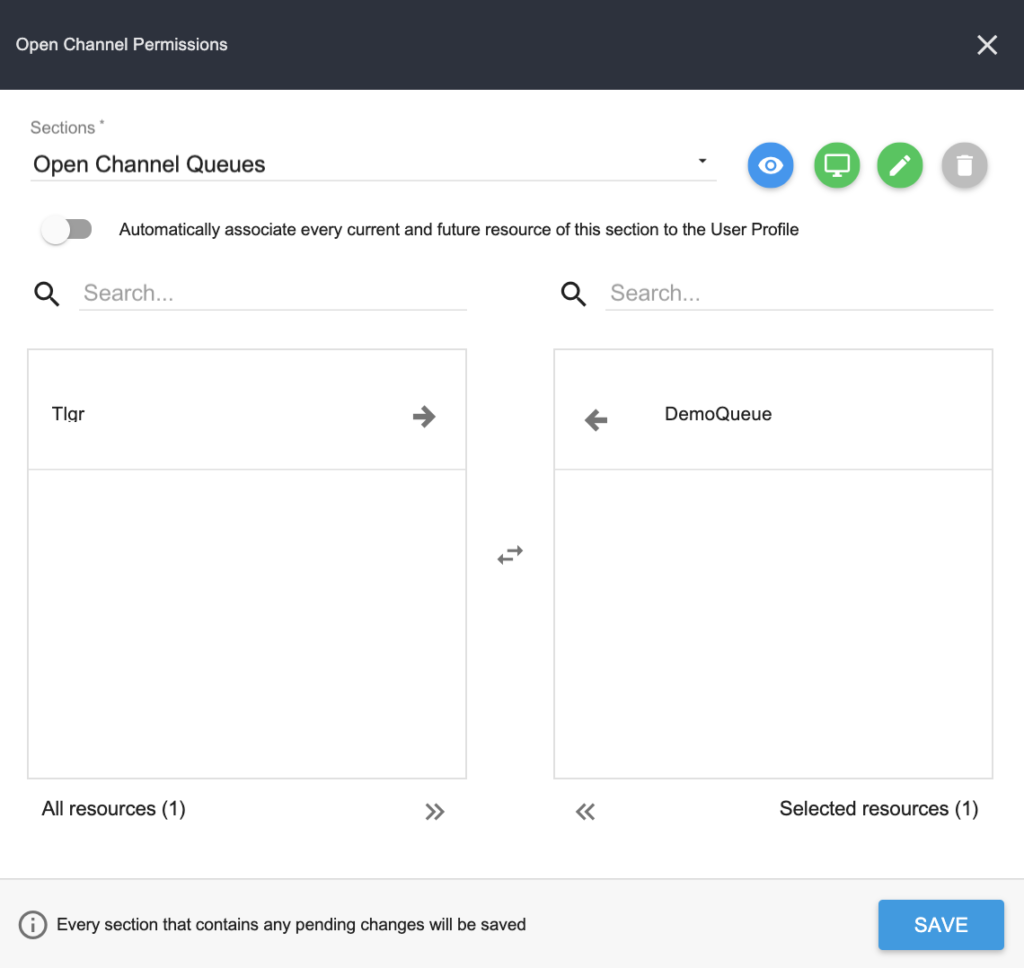
- choose one or more Open Channel Queues existing on the system and associate them to the user profile, adding visibility and permissions:
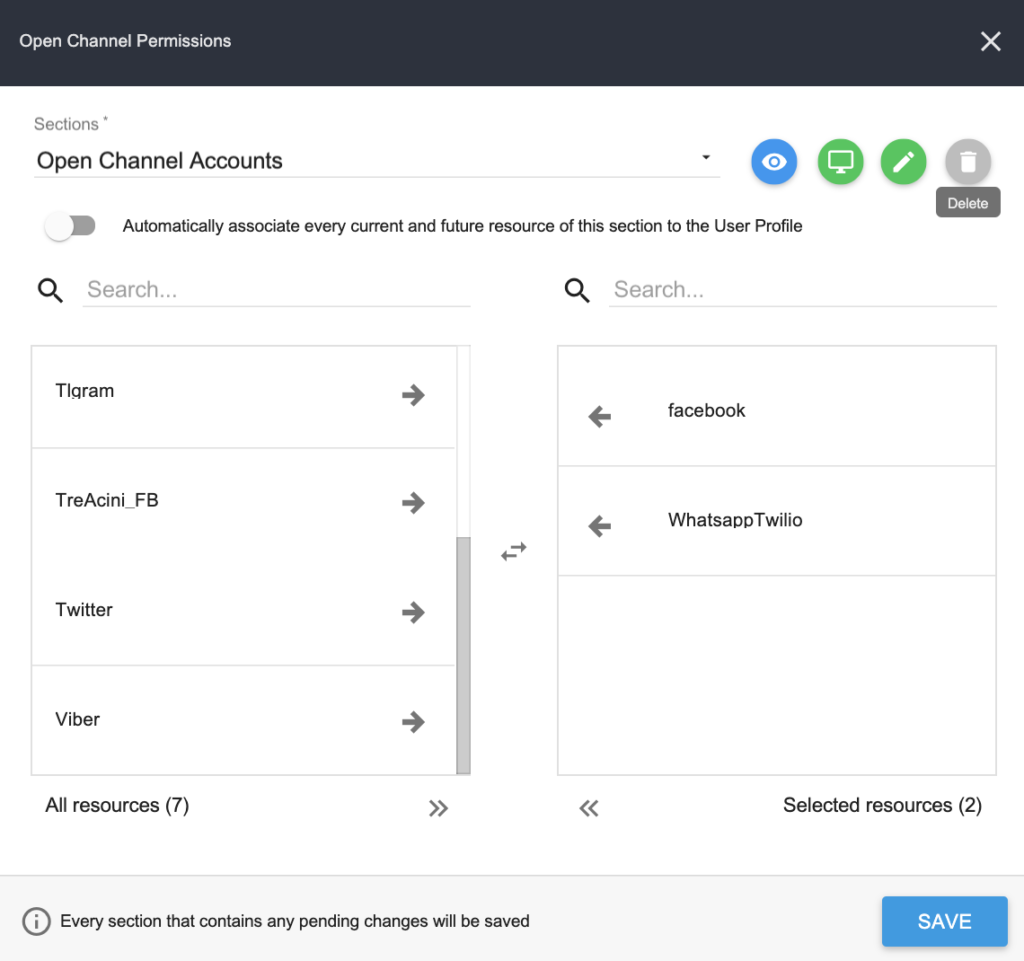
- choose one or more Open Channel Accounts existing on the system and associate them to the user profile, adding visibility and permissions:
- enable the Realtime view of the Open Channel activities:

Please note that anytime you click on Save, all the changes you have done to the permissions of any section and resource belonging to the same module will be saved as a whole:
Finally the Users belonging to this profile will have the following XCALLY Motion Desktop view:

Remember to associate also the Agents (in the Staff Module) you want the User to manage: the Users having this profile will manage only those who have been associated to it.
Cally Square
In order to add or change permissions to Cally Square to a User Profile, click on the Permissions tab:

and then on the Cally Square profile icon ![]() :
:

Now choose one by one all the sections whose permissions you want to associate to this User Profile among the following:

- Cally Square Projects
- ODBC
- Recordings
For example you can:
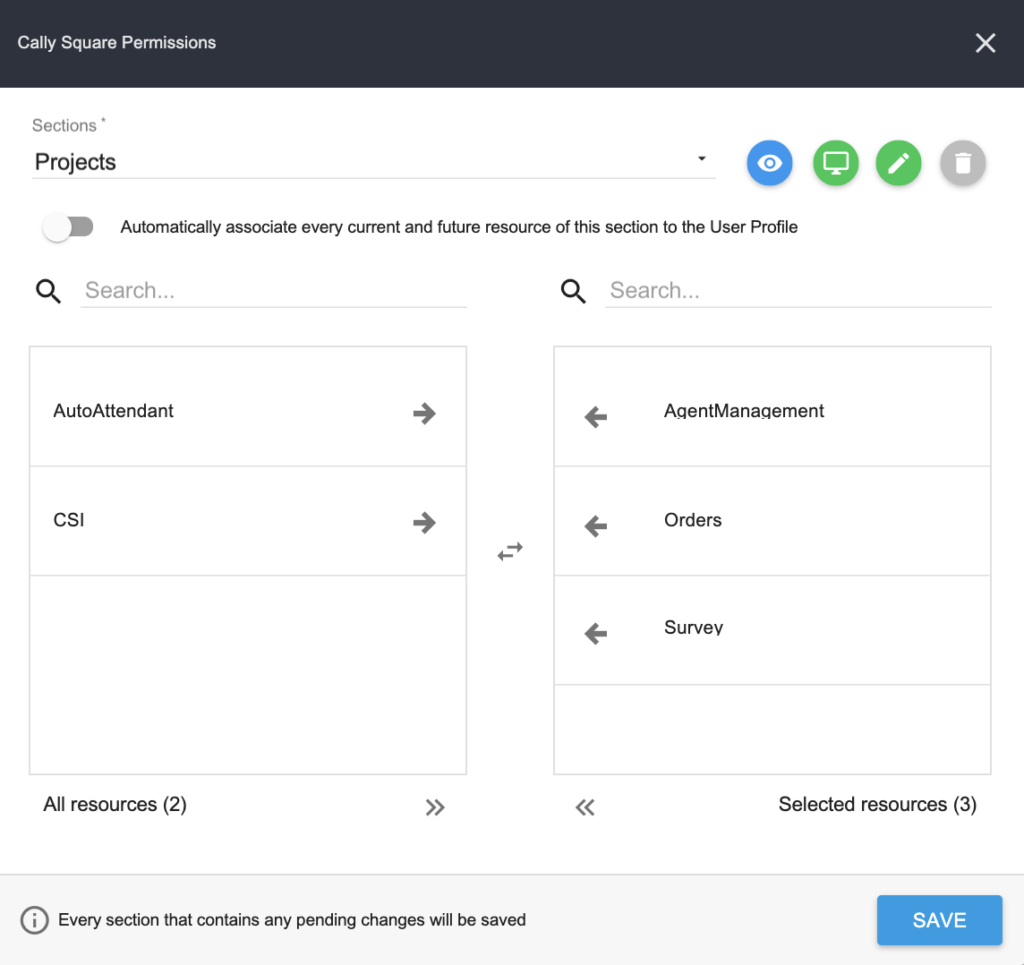
- choose one or more Projects existing on the system and associate them to the user profile, adding visibility and permissions:
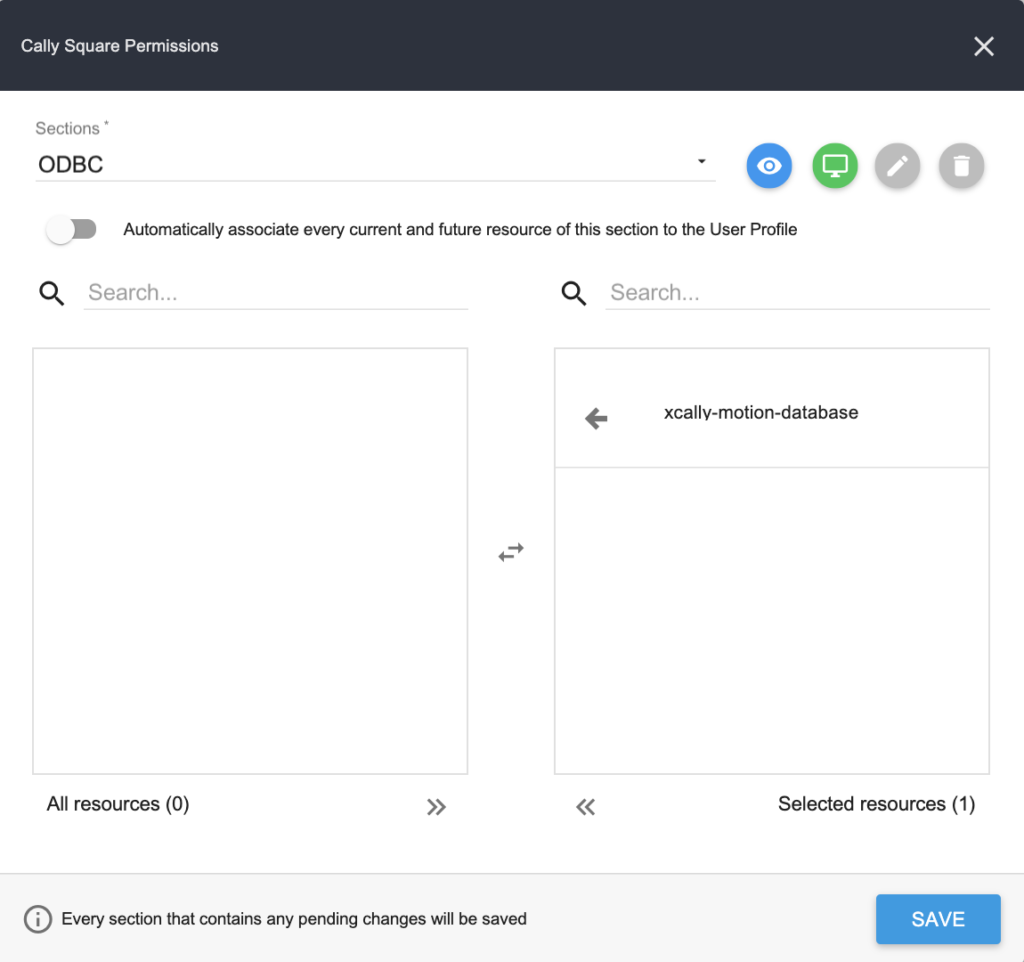
- add permissions on one or more ODBC resources (Open Database Connectivity: an open standard API for accessing a database and connect your IVR application to a remote DB), also choosing its visibility on the User menu:
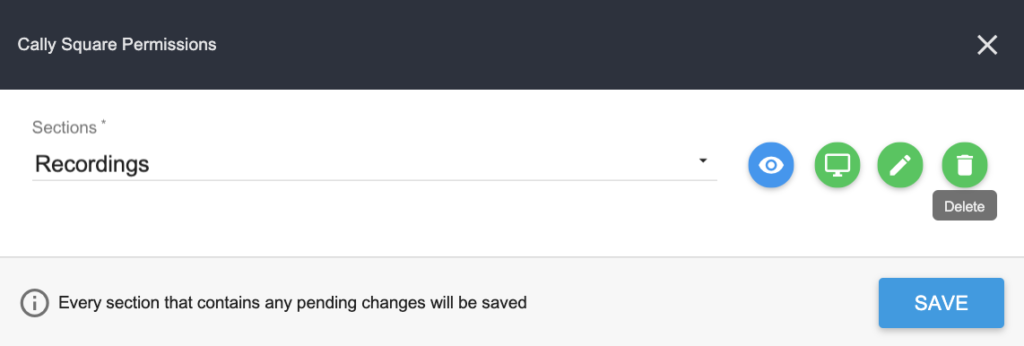
- enable all the Recordings to be associated to this Profile:
Please note that anytime you click on Save, all the changes you have done to the permissions of any section and resource belonging to the same module will be saved as a whole:
Finally the Users belonging to this profile will have the following XCALLY Motion Desktop view:

Remember to associate also the Agents (in the Staff Module) you want the User to manage: the Users having this profile will manage only those who have been associated to it.
JScripty
In order to add or change permissions to Jscripty to a User Profile, click on the Permissions tab:

and then on the Jscripty profile icon ![]() :
:

Now choose one or many Projects whose permissions you want to associate to this User Profile:
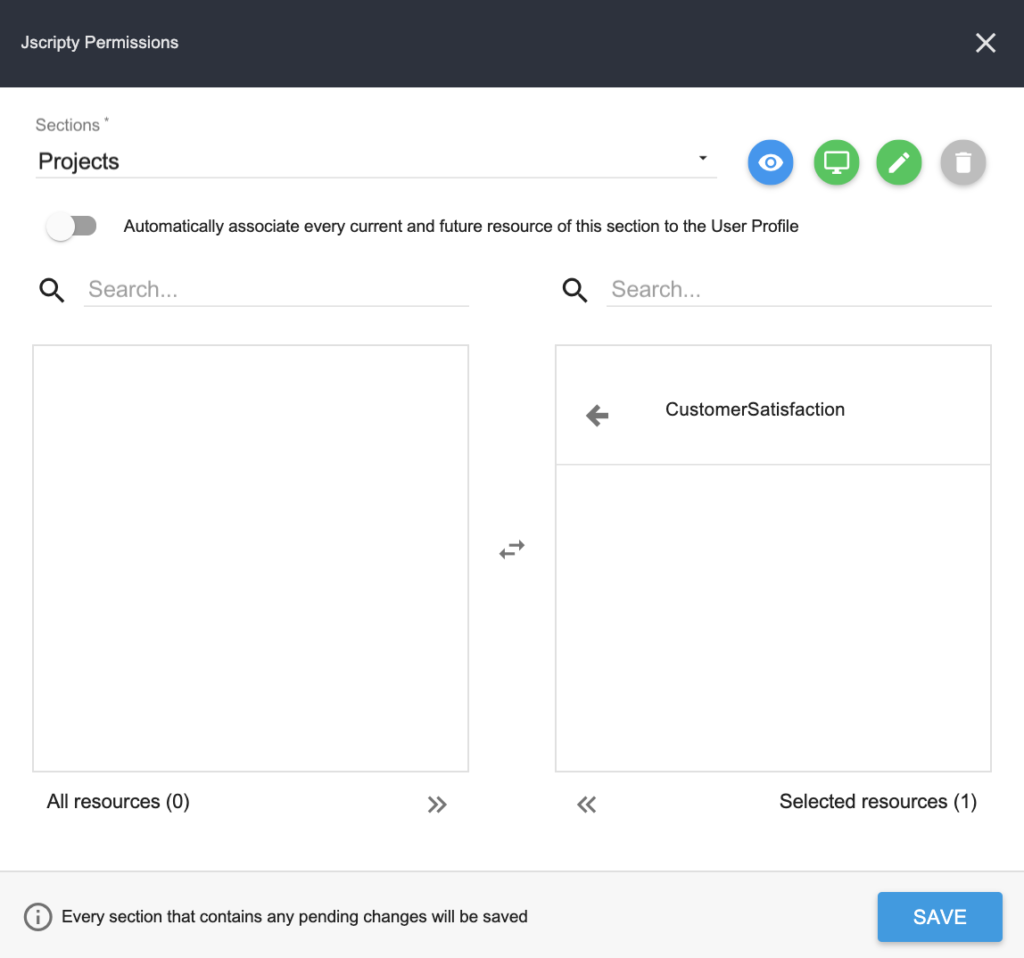
Now, if the visibility has been enabled the chosen Project will be displayed on the Users desktop interface:

Tools
In order to add or change permissions to Tools module to a User Profile, click on the Permissions tab:

and then on the Tools profile icon ![]() :
:

Now you can decide which sections to associate to this User Profile and which are the specific permissions and visibility:

- Canned Answers
- Dispositions
- Custom Dashboards
- Intervals
- Pauses
- Scheduler
- Sounds
- Tags
- Templates
- Triggers
- Trunks
about custom dashboards
if you enable one or more Custom Dashboards, they will be displayed in the Dashboard section of the Menu
You can for example enable some resources like the following:
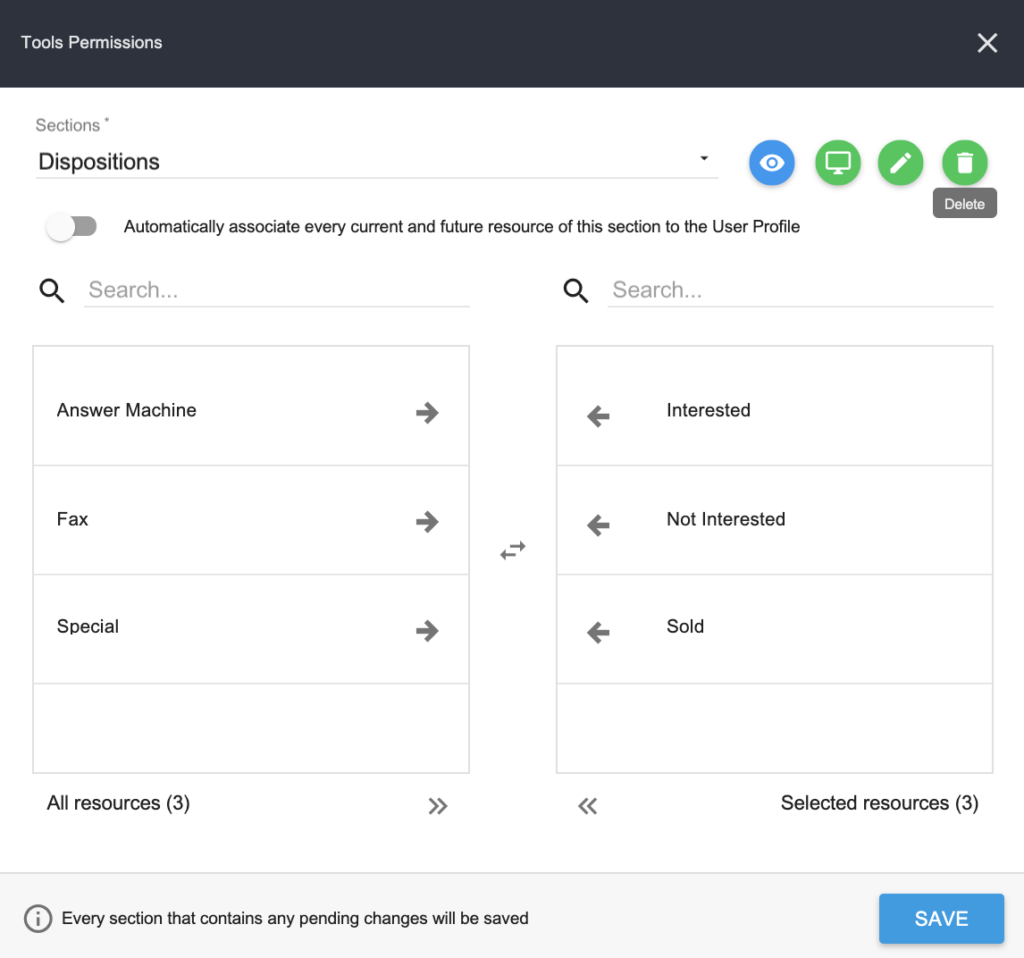
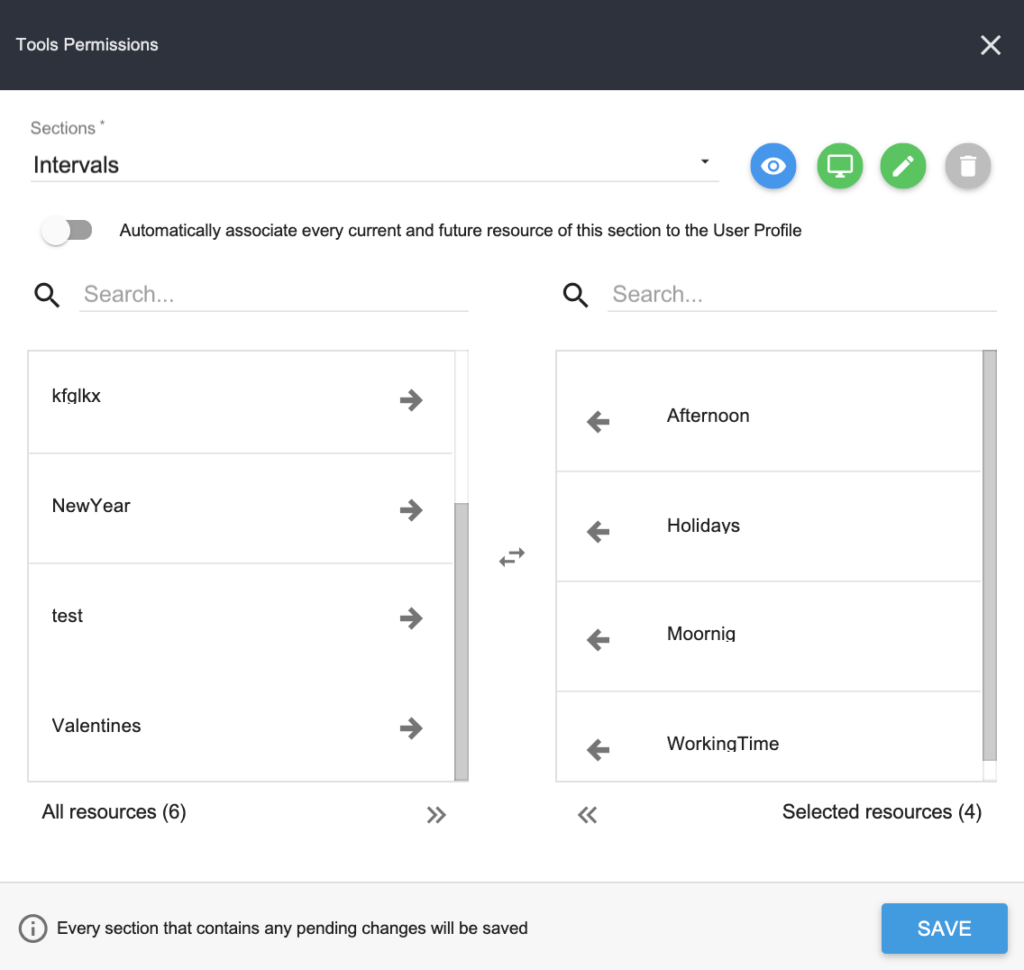
and consequently the Users belonging to this User Profile will have the chosen resources enabled and visible.
Please note that anytime you click on Save, all the changes you have done to the permissions of any section and resource belonging to the same module will be saved as a whole:
Analytics
In order to add or change permissions to Analytics to a User Profile, click on the Permissions tab:

and then on the Analytics profile icon ![]() :
:


- Reports
- Extracted Reports
- Metrics
For the Reports, first of all choose between Default or Custom:


and for each of these sections, choose among the existing reports displayed in the list, which one you want to associate to the User Profile, and the permissions and visibility to assign to the resources:
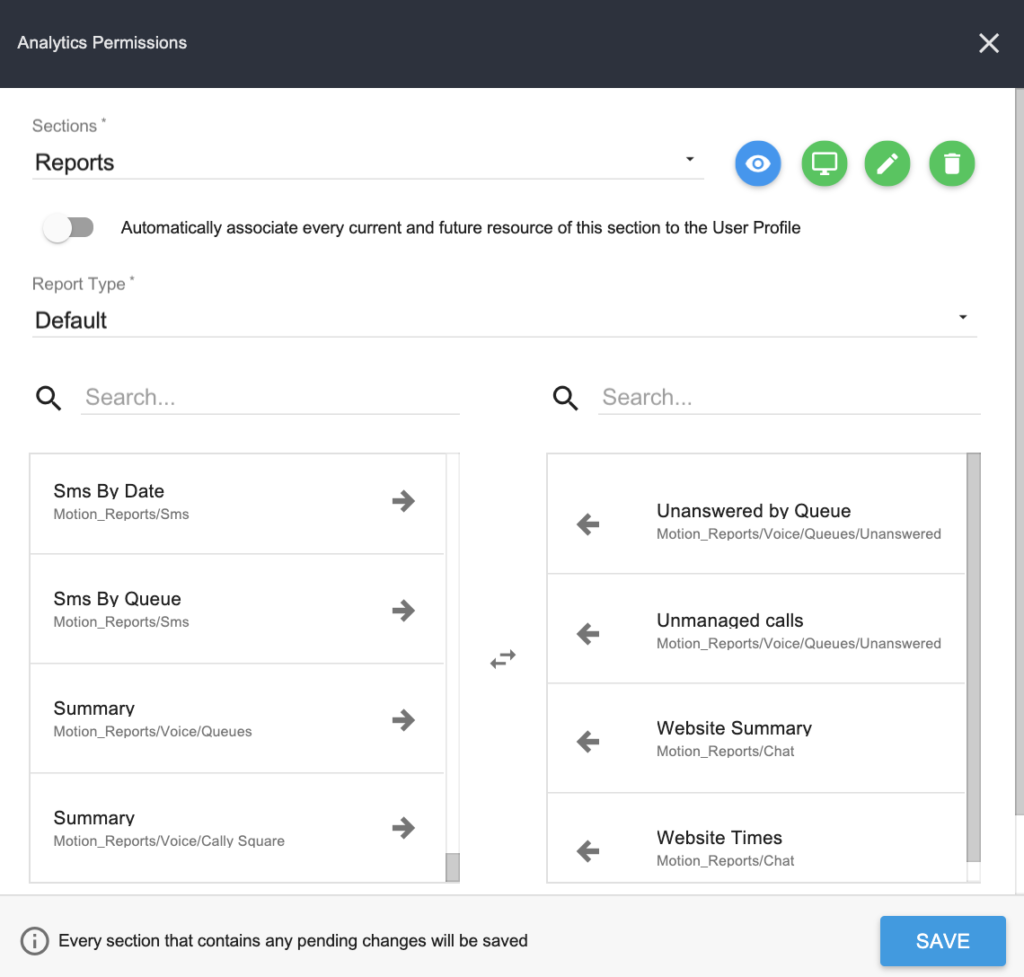
The same operation can be done for the extracted reports:
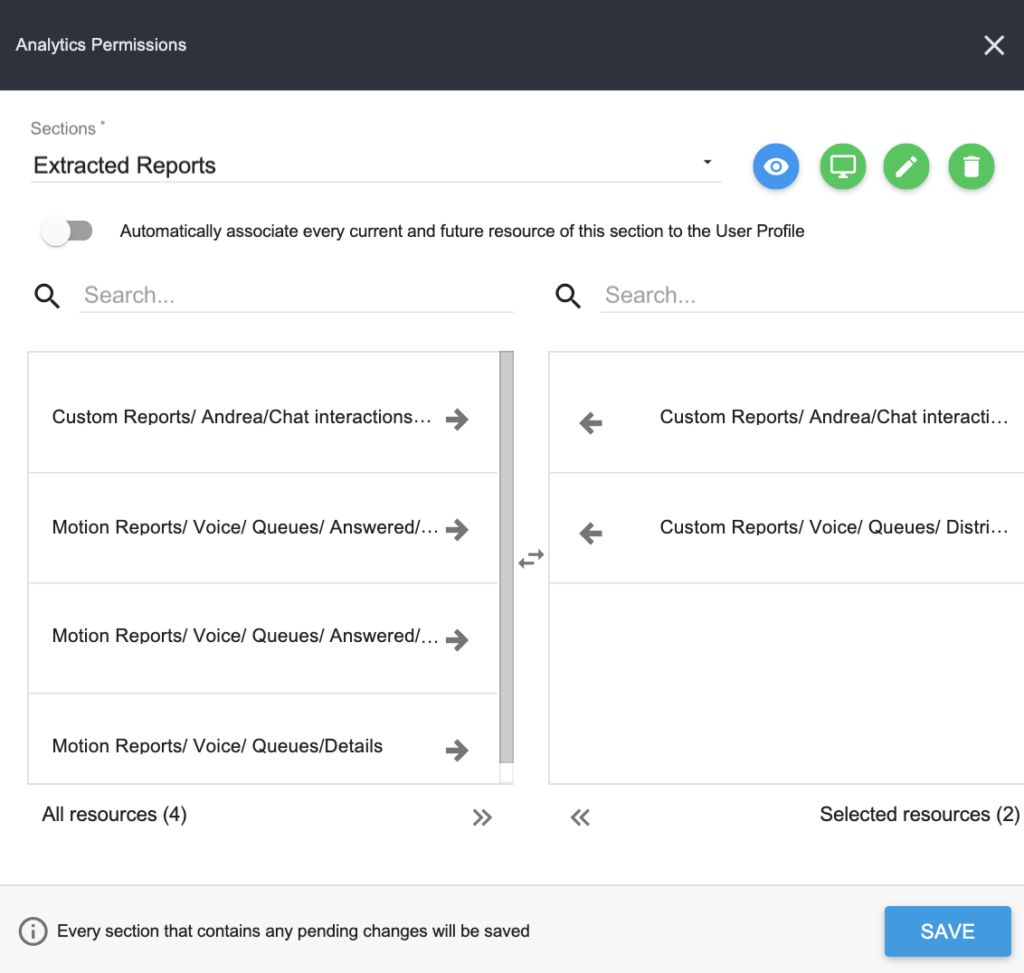
and for the Metrics on the system.
The Users who belong to this User Profile will be displayed a desktop user interface containing all the items which have visibility allowed.
Please note that anytime you click on Save, all the changes you have done to the permissions of any section and resource belonging to the same module will be saved as a whole:
Integrations
In order to add or change permissions to Integrations to a User Profile, click on the Permissions tab:

and then on the Integrations profile icon ![]() :
:

Now you can select which Integrations you want to associate to this User Profile, and their specific Permissions and Visibility, like in the following example:

About Triggers associated to Integrations:
When the Users create or modify triggers associated to an integration (e.g. Salesforce, Freshdesk, Zendesk, etc) they will only be able to select the integrations that are associated to their User Profile (all the others will not be displayed in the dropdown list of items)
App Zone
In order to add or change permissions to App Zone to a User Profile, click on the Permissions tab:

and then on the App Zone profile icon ![]() :
:

Choose which Plugins you want to associate to this User Profile and the Permissions and Visibility to grant to this Section resources:
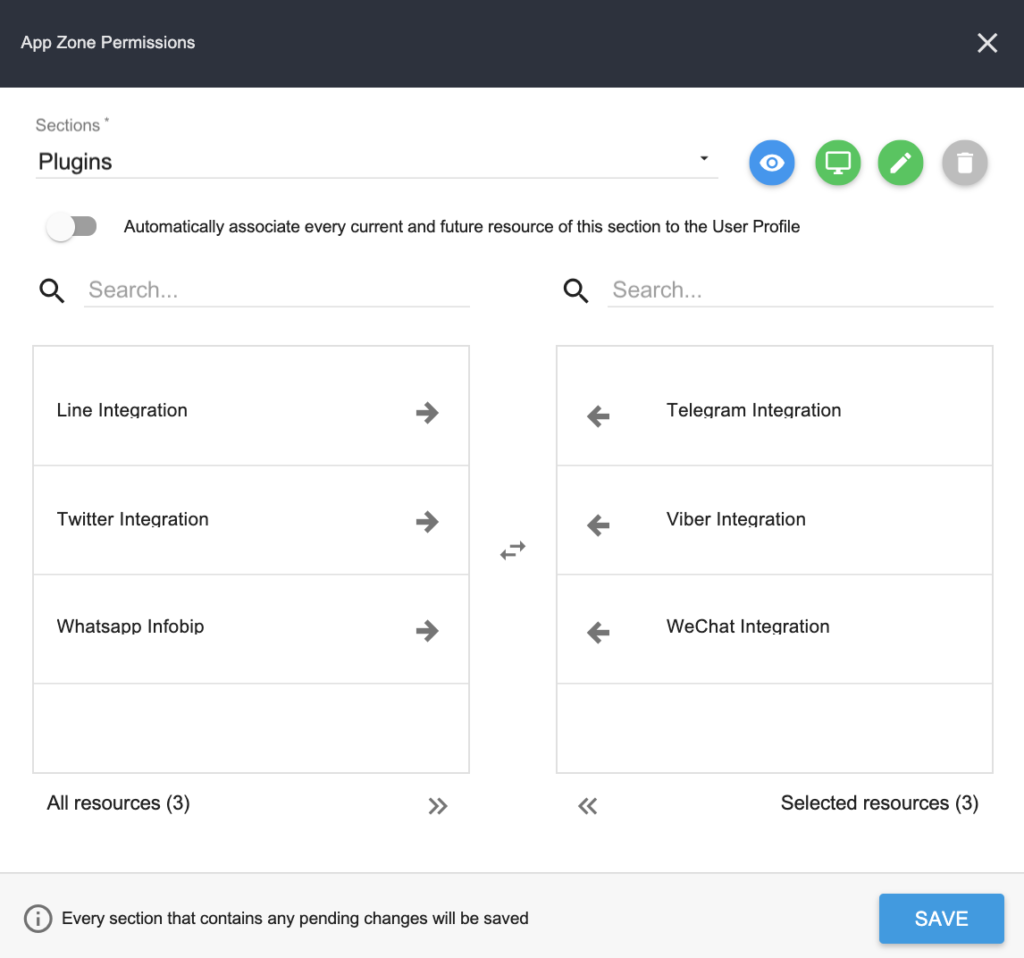
From now on, all the Users whose profile is configured like the one in the screenshot above, will have the desktop menu as follows:

WhatsApp Connector
In order to add or change permissions to WhatsApp Connector to a User Profile, click on the Permissions tab:

and then on WhatsApp Connector profile icon ![]() :
:

Now choose one by one all the sections whose permissions you want to associate to this User Profile among the following:

- WhatsApp Queues
- WhatsApp Accounts
- Realtime
Go on as for the other modules (for instance, Email or Chat).


