What is a List?
 A List of Contacts is used for grouping customers files together. You can find this section under the Contacts Manager Menu.
There are several contexts where you can use the lists:
- in Queue and IVR campaigns of the Motion Bull Dialer the list can contain contacts numbers to call or not (black-List)
- to prevent Agents to manage contacts they don’t have access to by limiting their access to some lists
- to insert new contacts coming from specific channels access points (e.g. chat, mail, and so on) in default lists
The Lists Section
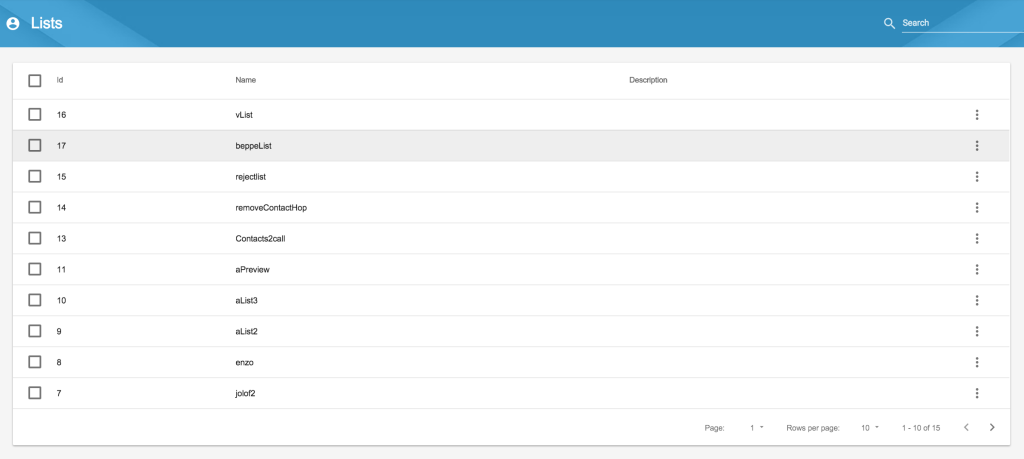
You can find the Lists section under the Contacts Manager menu:
Create a list
To create an agent click the New List button 
Enter the list’s details:
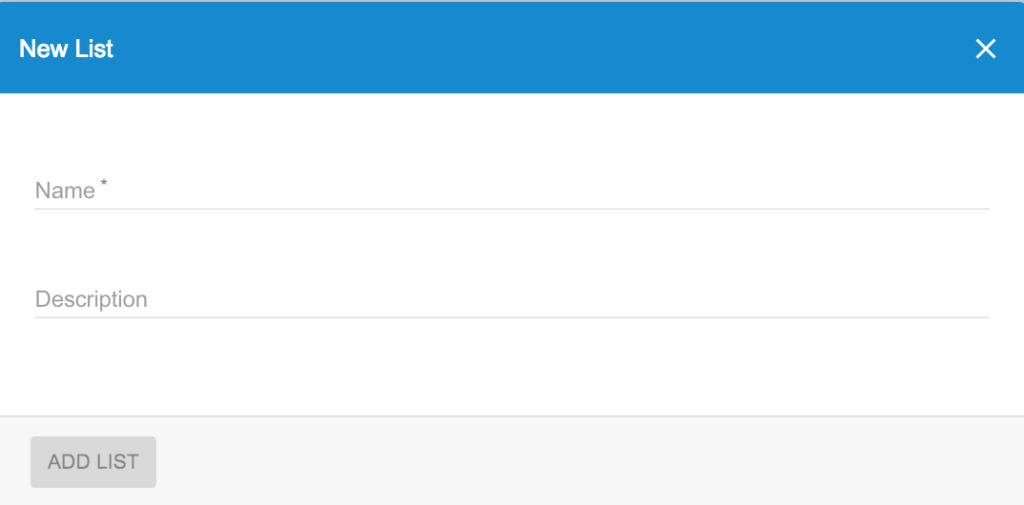
- Name
- Description (optional)
After the list is created, you can edit list details, add contacts to the list, add agents to the list and manage list’s custom fields and dispositions.
Edit a list
Find the list from the Contact Manager lists and click on Edit List:
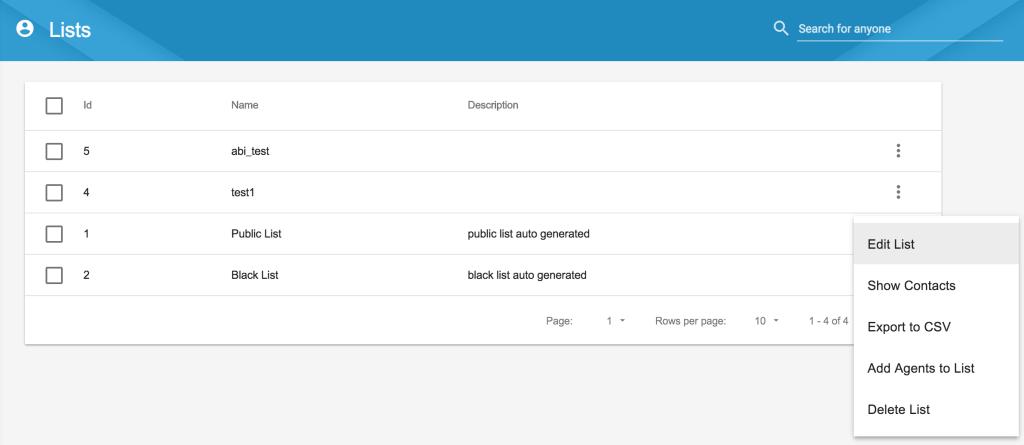
You will see 3 sections:
- Settings, where you canedit the name and description of the list
- Custom fields, where you can create, edit or delete custom fields of the list
- Dispositions, where you can create, edit or delete dispositions of the list

Settings
In the Settings General section you can change the name and description of the list, or associate a Dial Prefix to it.
A Dial Prefix is a number sequence that will be used in the click-to-dial functions of Omni Desktop Contacts and My Contacts sections. Anytime a contact of the specific list is called, this prefix will be added to the number dialed: this will make possible to use proper outbound routes (which must already be existing) when calling the contacts of one list.

Manage custom fields
We provide by default some contact fields that you can set when you add a contact in a list.
In addition to these fields, you can create and use custom fields, specific for that list.
To create a custom field, click on New Custom Field ![]() and enter details:
and enter details:
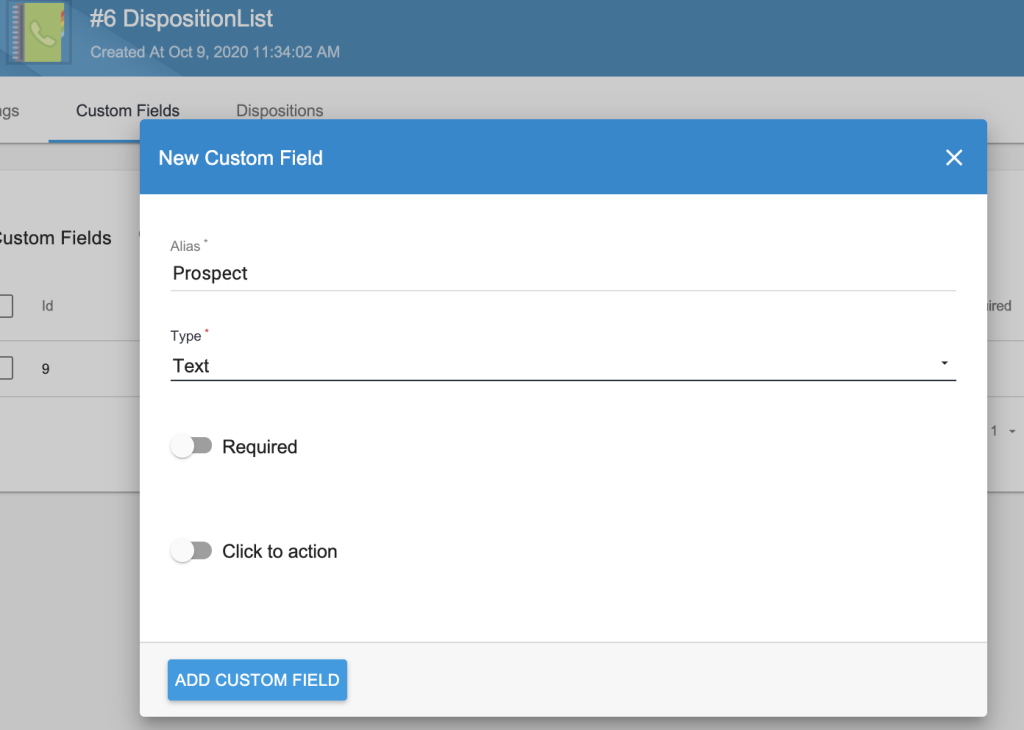
- Alias: name of the custom field that will be displayed on the contact’s view
- Type: type of the custom field. You can use one of the following custom field types:
- Text: a simple text input field
- Select: a single choice list. To add the choices for the select, write the text and click enter.
- Number: a number input field
- Switch: toggle switch with values true/false
- Datetime: Date and time picker
- Required: toggle if you want to make the custom field mandatory
- Click to Action: toggle to enable a click-to-action button in the Contact view
The action currently available is click to dial the number:New Actions will be available soon!
At the end, click Add Custom Field and confirm.After the custom field is created, you can view, edit or delete it under list of custom fields.
From now on, if you add or edit a contact in the list, you will be able to set the custom fields you have create in that list.
Manage dispositions
The Disposition is a label (or a set of labels, maximum in a three level hierarchy) that can be applied to each interaction record in order to better describe it.
For example, an Agent who has managed a call can use a disposition in order to indicate the type or resolution of the call itself, but this can be done for any type of interaction (as email, chat, sms, whatsapp messages, and so on) when this is closed.
By default, the following dispositions are usually available on your system (if your Administrator has not deleted one or more of them) :
- Fax
- Answer Machine
- Interested
- Not Interested
- Sold
- Special
but new Dispositions which are more suitable to your organization can be easily created. In the Tools- Dispositions section the Administrator can add global dispositions available for all the environment, in addition to specific dispositions that can be created for specific environments (as lists, channel accounts and websites).
To create a specific environment disposition, click on New Disposition ![]() and enter the details:
and enter the details:
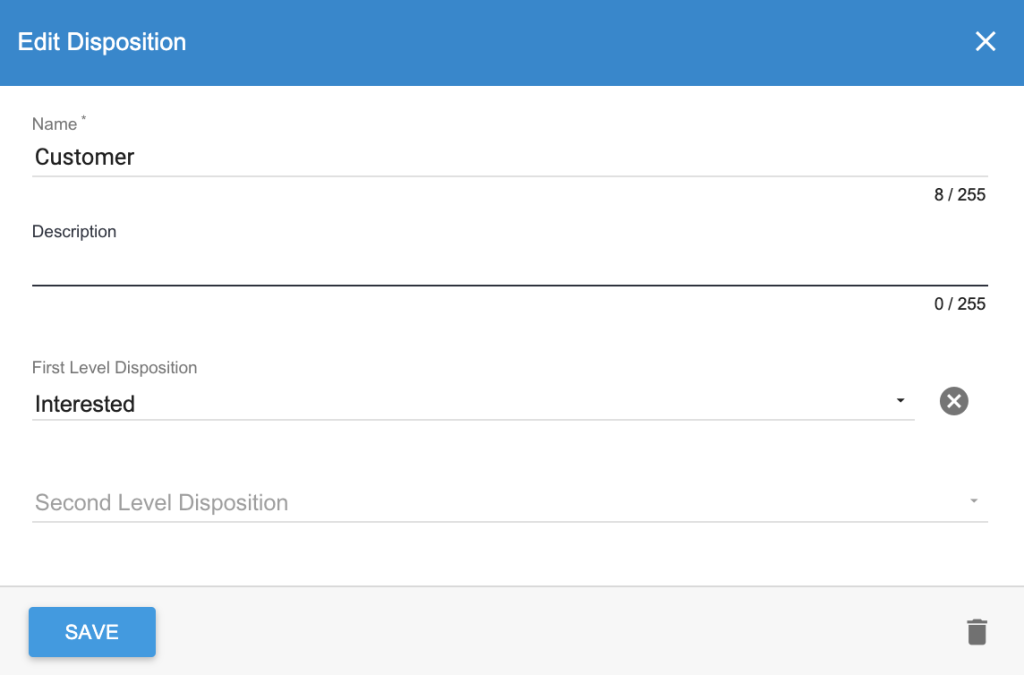
- Name: name of the disposition that will be displayed for agents managing contacts in this list
- Description (optional)
- First Level Disposition (optional): choose, from among the dispositions already present on the system, a disposition to which this refers in a two-level hierarchical relationship
- Second Level Disposition (Optional): choose, from among the dispositions already present on the system, a disposition to which this refers in a three-level hierarchical relationship
Click Save to confirm. After the disposition is created, you can view, edit or delete it (in the List of Dispositions)
Multi level dispositions You have the possibility to create multiple level (maximum 2) for each disposition:In the example shown in the image above, when Agents close and dispose an interaction they can choose a single level or a multi-level disposition (for example the combination # 1 # 5 # 7 or the combination # 1 # 5 # 6)
Add contacts to a list
Administrator or users with contact manager list permission can add contacts to a list. In order to add contacts to a list, find the list in the lists and click on Show Contacts.

You will be directed to Contacts Section. You can add contacts in two ways: add a single contact manually or upload multiple contacts from CSV file.
Add an agent to a list
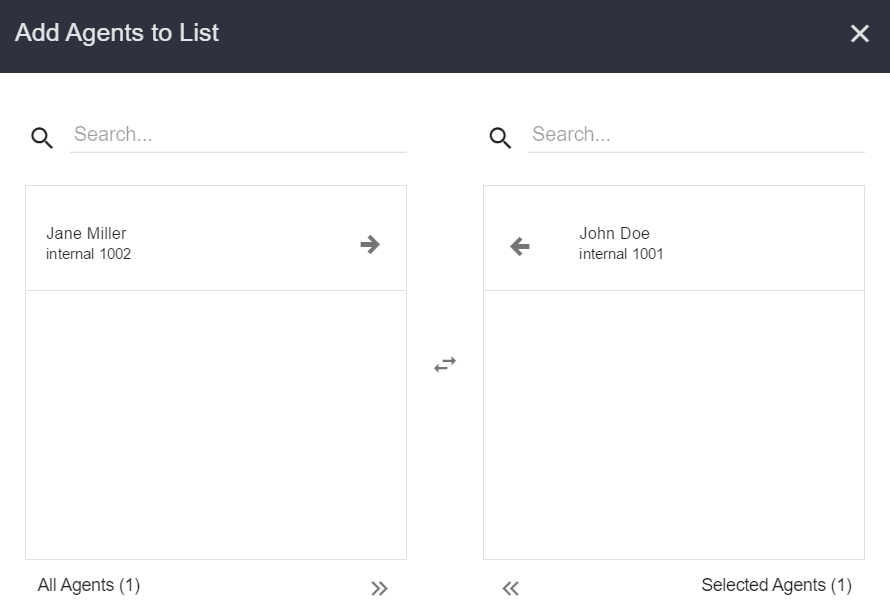
You need to add an agent to a list to allow him to see the list of contacts in the agent view. To add an agent to a list, find the list in the lists and click on Add Agents to List

On the pop-up screen search the agent you want to add and click on it. Click on << button to add All agents to the list. All changes are automatically saved.
Export contacts
To export all contacts of a list in CSV, find the list from the Contact Manager lists and click on Export to CSV:

Delete lists
To delete a list, find the list from the Contact Manager lists and click on Delete:
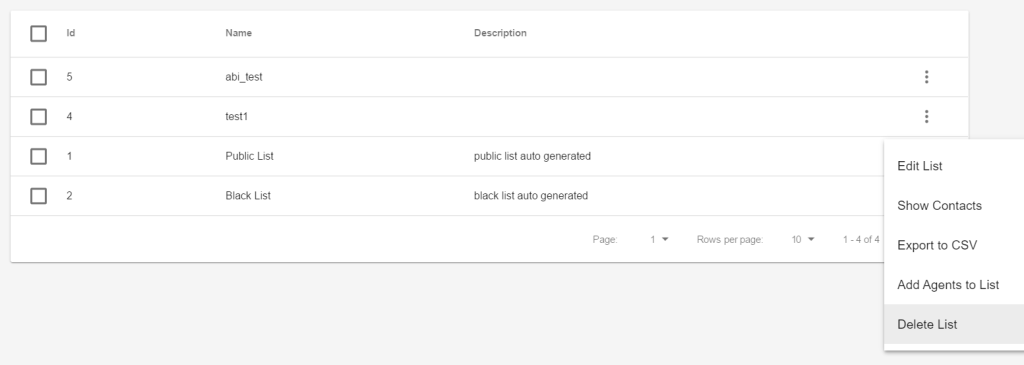
To delete multiple lists you can select the multiple lists to delete by marking the checkbox on the left side and then click on Delete button (ok to confirm).

Export lists
To export the Lists in CSV, select the CM Lists to export by marking the checkbox on the left side and click on the Export  button.

